

Table of Contents
- 8 Signs Your HVAC Compressor Is Failing
- Signs of a Bad Capacitor vs Compressor: How to Tell the Difference
- How to Test an AC Compressor: DIY vs. Professional Diagnostics
- Compressor Failure by System Type
- HVAC Compressor Replacement Cost: Repair or Replace?
- Preventative Maintenance Checklist to Avoid HVAC Compressor Failure
- Conclusion
Last Updated: August 19, 2026
8 Signs Your HVAC Compressor Is Failing
HVAC compressor failures rarely announce themselves all at once. Instead, small symptoms appear: a slightly warmer room, a rising bill, an unfamiliar noise. By the time the system stops working entirely, damage has been building for weeks or months. The HVAC compressor is the mechanical heart of your cooling system. It pressurizes refrigerant and drives it through the condenser and evaporator coils, making heat transfer possible. Catching problems early is the difference between a repair bill and a replacement bill.
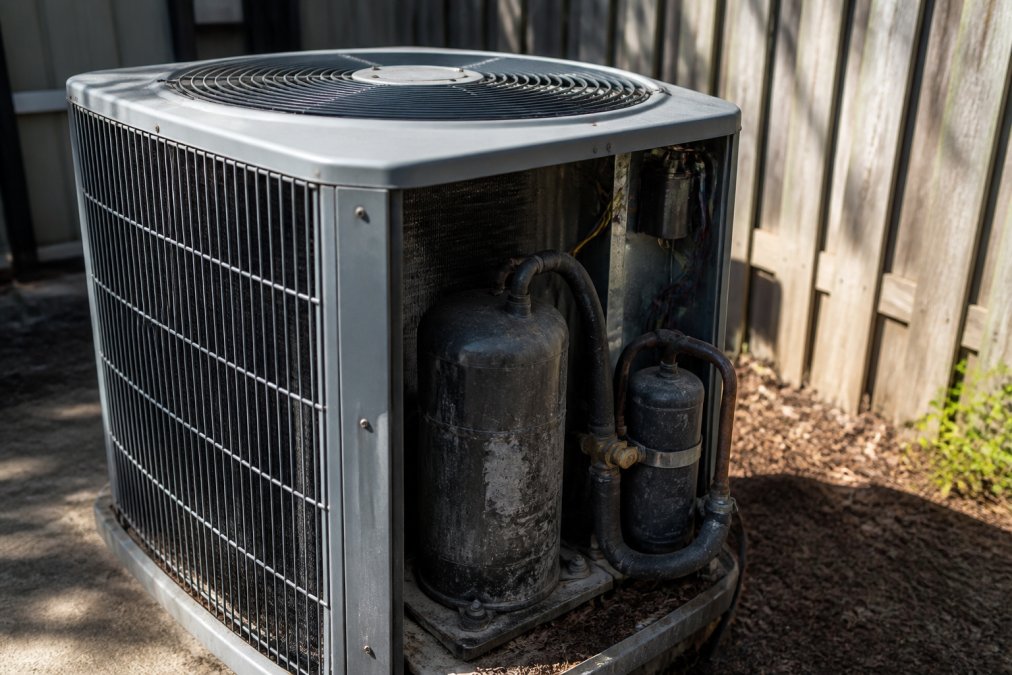
The HVAC compressor is the mechanical heart of your cooling system. It pressurizes refrigerant and drives it through the condenser and evaporator coils, making heat transfer possible. Catching problems early is the difference between a repair bill and a replacement bill.
Unusual Noises: Banging, Rattling, and Chattering
A healthy compressor runs with a consistent, low hum. Anything else deserves immediate attention. Banging or clanking usually points to a loose or broken internal component. Rattling at start-up often signals a failing capacitor or loose debris, but persistent rattling during operation can mean the compressor motor itself is struggling. Chattering or rapid clicking on start-up is a classic sign of a seized compressor trying and failing to turn over. Document when you hear the noise and share that detail with your technician.
Reduced Cooling Performance and Lukewarm Air
If the system runs but the air coming from the vents is lukewarm rather than cold, the compressor is likely not generating adequate system pressure to move refrigerant efficiently through the evaporator coil. Check the air filter and evaporator coil first. If airflow is strong and the filter is clean but the air is still warm, the compressor is the more likely culprit. A technician can confirm by checking system pressure against the manufacturer’s specified operating range.
Short Cycling and Start-Up Failure
Short cycling is when the system turns on, runs briefly, then shuts off before completing a full cooling cycle. Each start-up draws a surge of electrical current, accelerating wear on the compressor motor and capacitor. Start-up failure, where the system attempts to start but the compressor never engages, is a related problem. The thermal overload protector inside the compressor trips when the motor overheats, shutting it down before damage occurs. Repeated short cycling significantly shortens compressor life.
Circuit Breaker Tripping and Voltage Spikes
A compressor drawing excessive current will trip the circuit breaker. This happens when the compressor motor is failing and pulling more amperage than normal, or when a voltage spike has damaged internal windings. If your AC’s circuit breaker trips once, reset it and monitor. If it trips again within the same operating cycle, don’t reset it a third time. An HVAC technician can use an amp clamp to measure actual draw versus the rated load, determining quickly whether the compressor is the source.
Rising Electricity Bills Without Explanation
A compressor that’s struggling mechanically or electrically has to work harder to maintain the same output. Watch for bills that are higher than the same period in prior years, without a corresponding change in usage habits or ambient temperature extremes. According to the U.S. Department of Energy’s guidance on HVAC efficiency, a well-maintained system should maintain consistent energy use year over year. A sudden or gradual increase in consumption is a reliable diagnostic flag.
Refrigerant Leaks and Hissing Sounds
A hissing sound near the condenser unit typically indicates refrigerant leaking from a high-pressure line or fitting. Refrigerant leaks reduce system pressure, forcing the compressor to work harder and eventually causing it to overheat and fail. If your system is low on refrigerant, there’s a leak somewhere. Simply recharging without finding and repairing the leak accelerates compressor failure. Handling refrigerants requires EPA Section 608 certification. EPA Section 608 refrigerant handling regulations prohibit venting refrigerants to atmosphere and require certified technicians for service involving refrigerant recovery or recharge.
Increased Humidity Levels Inside
The evaporator coil removes moisture from the air as part of the cooling process. When the compressor isn’t maintaining adequate system pressure, the evaporator coil can’t perform this dehumidification effectively. The result is air that feels clammy and humid even when the system is running. If your home feels muggy despite the AC running and the system is running continuously without hitting the thermostat target, the compressor is likely underperforming.
Signs of a Bad Capacitor vs Compressor: How to Tell the Difference
Distinguishing a bad capacitor from a failing compressor is one of the most common diagnostic challenges in residential HVAC service. The symptoms overlap significantly, and misdiagnosing the two leads to either unnecessary compressor replacements or wasted service calls.
A capacitor failure typically presents as: the fan running but the compressor not starting, a humming sound from the condenser unit with no compressor engagement, or the system starting only after the reset button is pressed.
A compressor failure presents as: the capacitor tests within spec but the compressor still won’t start, the compressor starts but trips the thermal overload within minutes, or the compressor runs but produces no pressure differential.
The practical test: if a technician replaces the capacitor and the compressor still won’t start, the compressor itself is the problem. Capacitors are inexpensive relative to compressors, so most technicians will test or replace the capacitor first before condemning the compressor.
| Symptom | Likely Cause | Diagnostic Step |
|---|---|---|
| Fan runs, compressor doesn’t start | Bad capacitor | Test capacitor with multimeter |
| Humming at start-up, no engagement | Bad capacitor or seized compressor | Check capacitor first; if OK, check amp draw |
| Compressor starts, trips quickly | Thermal overload / overheating | Check refrigerant charge and airflow |
| Compressor runs, no cooling | Low refrigerant or internal failure | Measure system pressure |
| Circuit breaker trips repeatedly | Compressor drawing excess current | Measure amp draw vs. rated load |
How to Test an AC Compressor: DIY vs. Professional Diagnostics
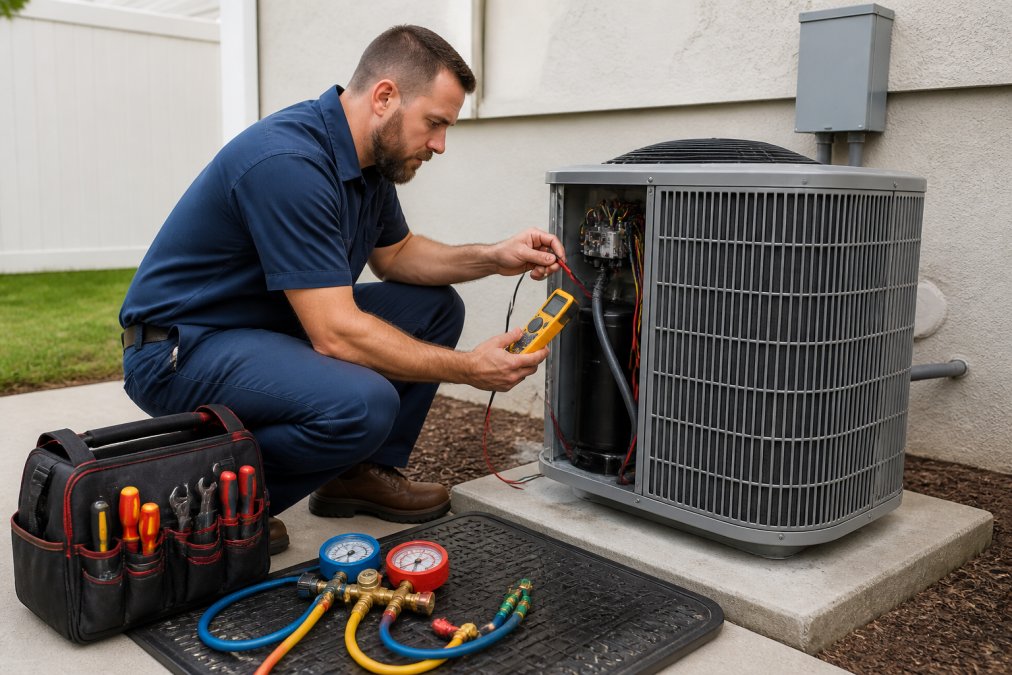
Testing an AC compressor safely requires knowing which checks are appropriate for a homeowner and which require a certified HVAC technician.
Safe DIY Checks You Can Do First
Before calling a technician, perform these checks:
- Inspect the air filter. Replace if it’s been more than 90 days.
- Check the circuit breaker. Confirm the AC breaker hasn’t tripped. Reset once if it has, and observe whether it trips again.
- Inspect the condenser unit. Clear any debris, leaves, grass clippings, or overgrown vegetation from around the unit. The condenser needs unobstructed airflow to reject heat.
- Check the thermostat settings. Confirm it’s set to cool and the set point is below ambient temperature. Replace the thermostat batteries if it’s been over a year.
- Listen for start-up sounds. Note whether the compressor engages (you’ll hear it start and feel the unit vibrate slightly) or whether only the fan runs.
- Check for ice on the refrigerant lines. Ice on the copper lines near the air handler indicates restricted airflow or low refrigerant charge, both requiring professional service.
Do NOT attempt to open the electrical panel on the condenser unit or probe the compressor terminals unless you are a licensed electrician or certified HVAC technician. Capacitors store a lethal charge even when the system is powered off. Discharging a capacitor incorrectly causes serious injury.
When to Call an HVAC Technician
Call a certified HVAC technician when:
- The circuit breaker trips more than once in the same cycle
- The compressor won’t start after the capacitor has been replaced
- You hear banging, grinding, or chattering from the condenser unit
- The system runs but produces no measurable cooling after 20+ minutes
- You suspect a refrigerant leak (hissing sound, ice on lines, oil stains near fittings)
- The system is short cycling repeatedly
A qualified technician will use a manifold gauge set to measure system pressure, an amp clamp to check compressor current draw, and a multimeter to test the capacitor and compressor windings.
Compressor Failure by System Type
Not all compressors fail the same way. The failure mode depends heavily on the system type.
Central split systems use a reciprocating or scroll compressor housed in the outdoor condenser unit. Scroll compressors tend to fail gradually with reduced capacity before complete failure. Reciprocating compressors often fail more abruptly with mechanical noise.
Mini-split systems use variable-speed inverter compressors that modulate output rather than cycling on and off. Reduced capacity, refrigerant leaks, and electrical faults still occur. Error codes displayed on the indoor unit are often the first diagnostic signal.
Commercial rooftop units (RTUs) run harder and longer than residential equipment. Thermal overload trips and capacitor failures are more common due to larger compressor motor demands.
Package units combine all components in a single cabinet, making compressor diagnosis harder due to restricted access. The same diagnostic principles apply.
For mini-split and inverter-driven systems, always pull the error code log from the indoor unit before calling a technician. Many inverter compressors store fault history that directly identifies the failure mode, saving diagnostic time and cost.
HVAC Compressor Replacement Cost: Repair or Replace?
HVAC compressor replacement cost is one of the most significant repair decisions a homeowner or facility manager will face. The decision to replace the compressor versus replace the entire system is not always straightforward.
The $5,000 Rule for HVAC Decisions
A practical decision framework: multiply the system’s age in years by the estimated repair cost. If the result exceeds $5,000, replacement of the full system is generally the better financial decision. For example: a 10-year-old system facing a compressor replacement that costs $1,800 in parts and labor produces a score of $18,000, well above the threshold. As documented in ENERGY STAR’s guidance on HVAC replacement decisions, systems older than 10 years with major component failures often cost more to maintain than to replace with a higher-efficiency unit.
The real question isn’t just what the repair costs today. It’s what the system will cost you over the next three to five years in energy consumption, repeat repairs, and reliability. A new high-efficiency system often pays back the replacement cost difference within a few cooling seasons.
How a Compressor Soft Starter Can Extend Equipment Life
A soft starter limits the inrush current during compressor start-up, reducing the electrical and mechanical stress that causes premature wear. For systems where the compressor is still serviceable but showing signs of start-up strain, hard starts, capacitor failures, or circuit breaker nuisance trips, a soft starter is often a cost-effective alternative to full replacement.
Cedars HVAC carries the Nu-Calgon NuStart Compressor Soft Starter line, designed specifically for single-phase and three-phase HVAC compressors. Available models include:
- Nu-Calgon 5010-10, 110-115V, 12-20 RLA, 1-Phase, $301.00
- Nu-Calgon 5010-20, 208-230V, 8-16 RLA, 1-Phase, $301.00
- Nu-Calgon 5010-21, 208-230V, 16-32 RLA, 1-Phase, $301.00
- Nu-Calgon 5010-30, 208-230V, 4-28 RLA, 3-Phase, $329.00
Match the model to your compressor’s rated load amps (RLA) and voltage. If you’re unsure which model fits your system, Cedars HVAC’s team can help you identify the right unit.


Preventative Maintenance Checklist to Avoid HVAC Compressor Failure
The most expensive compressor failure is the one that was preventable. Most compressor failures trace back to restricted airflow, dirty coils, low refrigerant charge, and electrical component degradation. According to the Air Conditioning Contractors of America’s maintenance standards, regular preventative maintenance significantly extends HVAC system life and reduces the frequency of major component failures.
Use this checklist at the start of each cooling season and again mid-season for commercial systems:
Monthly:
- Inspect and replace air filter if restricted
- Clear debris from around outdoor condenser unit (maintain 2 ft. clearance on all sides)
- Check condensate drain line for clogs or standing water
Quarterly:
- Inspect refrigerant lines for oil stains (indicates a slow leak)
- Listen for unusual sounds at start-up and during operation
- Check thermostat calibration and battery condition
Annually (professional service):
- Measure system pressure with a manifold gauge set
- Check refrigerant charge and inspect for leaks
- Test capacitor capacitance with a multimeter
- Measure compressor amp draw versus rated load
- Clean evaporator and condenser coils
- Inspect electrical connections for corrosion or loose terminals
- Lubricate fan motor bearings if applicable
- Verify proper airflow across evaporator coil (check temperature differential)
Every 3-5 years:
- Evaluate compressor soft starter if system shows signs of hard starting
- Assess system age and efficiency against current equipment standards
- Review warranty status on compressor and major components
A system that receives consistent annual service rarely fails without warning. The technician who services the unit each spring will catch a degrading capacitor, a marginal refrigerant charge, or a coil that’s restricting airflow before any of those issues cascade into compressor failure.
Diagnosing a failing HVAC compressor early requires knowing what to look for and acting before a marginal system becomes a failed one. Whether you’re a homeowner tracking unusual noises or a technician evaluating system pressure, the signs your HVAC compressor is failing follow predictable patterns, and most are catchable before the unit seizes. Cedars HVAC stocks the compressor components, soft starters, and professional-grade tools needed to get systems back online fast, with free nationwide shipping and over 2,400 SKUs from trusted brands. Shop compressor parts and start kits at Cedars HVAC and get the right part the first time.
Frequently Asked Questions
How can I tell if my HVAC compressor is bad?
The most common signs your HVAC compressor is failing include warm air blowing from vents, unusual noises like banging or rattling from the condenser unit, frequent short cycling, a circuit breaker that keeps tripping, and noticeably higher electricity bills. Refrigerant leaks or a seized compressor that won't start at all are late-stage symptoms. If you notice two or more of these at once, have an HVAC technician run a full diagnostic before the unit fails completely.
What is the average lifespan of an HVAC compressor?
Most residential HVAC compressors last 10 to 15 years under normal operating conditions. Systems in hot climates that run for long seasons often reach the lower end of that range due to higher thermal load and mechanical wear. Regular preventative maintenance, including keeping the condenser coils clean, maintaining proper refrigerant charge, and replacing a failing capacitor promptly, can push a compressor toward the upper end of its expected service life.
Can a failing compressor be repaired, or does it have to be replaced?
It depends on what failed. A seized compressor motor or internal mechanical failure almost always requires full replacement. However, symptoms that look like compressor failure, such as hard starts or short cycling, are sometimes caused by a bad capacitor or low refrigerant rather than the compressor itself. An HVAC technician can confirm the root cause with pressure and electrical testing. Replacing a capacitor costs far less than a new compressor, so accurate diagnosis matters before ordering parts.
What is the $5,000 rule for HVAC repairs?
The $5,000 rule is a simple cost-benefit guideline: multiply the system's age in years by the estimated repair cost. If the result exceeds $5,000, replacing the system is generally the smarter financial decision. For example, a 12-year-old unit facing a $500 repair scores 6,000, suggesting replacement. It is a rough framework, not a hard rule, but it helps homeowners and facility managers weigh HVAC compressor replacement cost against the remaining value of an aging system.